When it comes to painting your boat, antifouling is one of the most dreaded tasks. Not only can the choice of antifouling paints feel overwhelming, but the preparation and application of the substance are also vital if you want the best finish. Remember, antifouling has a challenging yet important job to do beneath the water, so it should always be applied in the best possible conditions.
Step-by-step guide on how to prepare a boat for antifouling:
- Always wear protective clothing while dealing with antifouling, including full overalls with a hood, face mask, gloves, and goggles.
- If your overalls don’t have a hood, consider a hat to protect your head from the toxic paint.
- Jet/pressure wash the boat immediately when it comes out of the water to remove any growth, dirt, and old/flaking antifoul.
- If small areas of flaking are found, remove any loose antifoul with a paint scraper.
- If the antifouling is particularly loose or built up, consider stripping the boat back to the gelcoat. You may wish to hire a professional to speed up the process.
- Don’t forget to mark the waterline!
- Take special care with the keels. Cast-iron should have a shiny surface before antifouling, while lead keels need the tarnish oxide layer and any grease/contamination removed.
- Stir all paints thoroughly before use.
- Check you’ve got the right primer for your antifoul paint before priming.
- Watch out for anodes that shouldn’t be painted over, or different surfaces that require a different type of antifoul (for example, aluminium outdirives).
- Apply masking tape to the waterline to ensure a crisp, clean edge.
- Apply primer and antifouling using rollers. You can also spray antifouling paint, but this should only be undertaken by a professional.
- Be sure to check and adhere to minimum overcoating and immersion times (these will be stated on the tin).
- For most boats, one coat of primer and two coats of antifouling is correct. A third coat should also be applied to high-wear areas like the waterline, keels, and rudder.
Out with the old
As soon as you haul your boat ashore, it’s important to pressure wash the hull immediately to remove the previous antifouling. If it’s allowed to dry, getting off the old paint will be far more difficult and time-consuming!
If you find loose or flaking antifoul while pressure washing, this can be removed with a paint scraper. However, if many layers have been allowed to build up and you notice a lot of flaking, you may want to strip the hull back so that no antifouling remains, and you can start again with a clear surface (generally, this will involve stripping the hull down to either the gelcoat or primer).

How you apply antifouling is important, both for your own health and in order that it does its job and lasts the distance.
It’s important to note that antifouling dust is extremely hazardous, and removing built-up antifouling should be completed with caution (and plenty of PPE). If you are planning to do it yourself, you should consider either wet sanding the hull or stripping the paint using a chemical stripper that’s formulated for use on fibreglass (or whatever your hull is made from).
Wearing full protective clothing, including goggles and an effective facemask, is vital when removing antifouling. While buying a cheap decorator’s mask can be tempting, please note that these aren’t strong enough to protect your lungs from the poisonous dust that removing antifouling will disperse.
If you’re not confident, it may be better to hire a professional to help prep your hull. A soda or slurry-blasting contractor with experience in removing antifouling will also be able to complete the process much more quickly than you would be able to achieve alone, so the cost of the labour can be off-set against the time saving – not to mention saving the risks to your health!

It’s easier to remove growth, weeds, and previous coats of antifouling immediately after the boat comes out of the water. The more it dries, the harder it will be to remove!
Usually, even after all the previous antifouling has been removed, the waterline will be obviously and easily visible. But even so, it’s a good idea to mark the waterline before moving on with the antifouling process to ensure you can accurately reinstate it.
Before removing all previous layers, you may wish to measure the distance of the waterline below the gunwale at 2-foot intervals, just in case it isn’t easy to spot once the boat has been stripped back.
Prepping the hull
If you want good-looking, long-lasting antifouling that’s able to do its job, taking time to prep and prime properly is essential! And the flatter/smoother the surface, the better.
This is particularly important if you have a fast/racing boat, as a rough surface will increase drag and slow you down! Not to mention that the protective antifouling won’t be able to adhere as well to an uneven surface.

Apply masking tape at the waterline to keep a crisp, straight edge. Remember to remove the tape after each coat of antifoul, as it can be difficult to remove if left in place. (Instagram @writingandsailing)
Once you’ve stripped off the previous layers of antifouling, you’re going to need to start by painting the hull with a coat of antifoul primer. There are lots of options when choosing primers, so you’ll need to take a little care to find one that’s appropriate to the type of antifoul you’ll be applying (for more information on types of antifouling, take a look at our article on how to choose antifouling).
If you’ve stripped your boat all the way back to the gelcoat, you may also want to consider applying an epoxy coating to guard against osmosis. Speak to a boat surveyor first to test the moisture levels in the hull, as sealing in excess water with epoxy will be counter-productive and lead to more issues down the line!
If you’ve left some or all of last year’s antifouling paint on the hull, you might be worried about applying a new antifoul over the top. However, with modern antifouling paint, there are now considerably fewer problems when it comes to applying different antifouling over previous coats than there were in the past. That said, if you’re at all unsure, it can be worth applying a primer as a ‘tie coat’ between the different antifouls. This will allow you to benefit from a clean slate without stripping the boat right back.
Caring for keels
The keel(s) of your boat will also need attention when it comes to applying antifouling, and you should be careful to ensure they’re perfectly faired to give the antifoul the best opportunity to remain strongly adhered to the surface.
- If you find rust on your cast-iron keels, this must be removed with an angle grinder before painting – the surface of the metal should be bright and smooth.
- If you have unpainted lead keels, you’ll need to remove the tarnished oxide layer by rubbing it down with emery paper or a wire brush in a power drill. Next, remove the grease and contamination by washing the area with a suitable cleaner before initial priming with an etch primer.
Once you’ve prepped your keels, you can start applying the recommended primer for your selected antifoul.

Taking some time to properly prepare your keels before antifouling will make a significant difference to the performance of your vessel. (Instagram @writingandsailing)
Gather your equipment
When you first open your tin of antifouling paint, you might be fooled into thinking the intense colour means it doesn’t need stirring – but you’d be wrong! Many antifouling paints contain over 50% solid content, which sinks to the bottom of the tin during storage. So, it’s essential to give your antifoul a good shake and stir before applying. A stirring device designed for use with a cordless drill is ideal for this purpose.
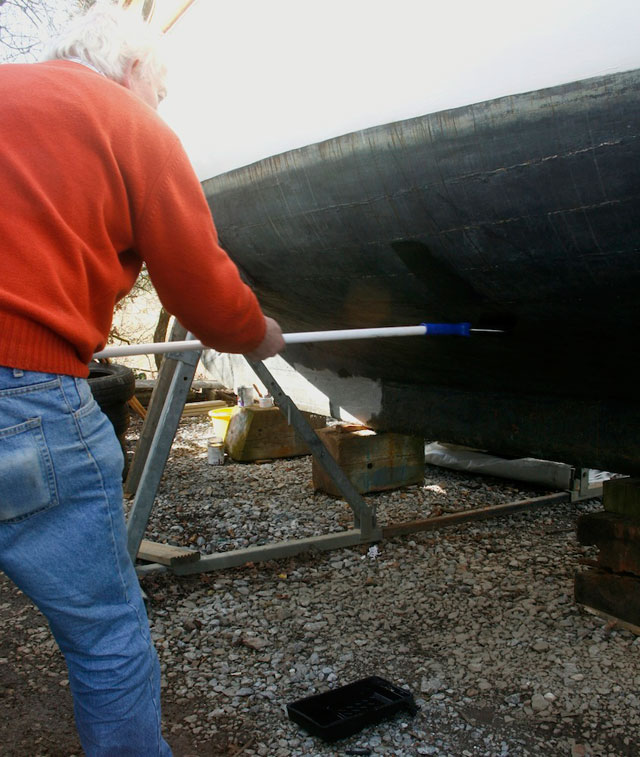
The quickest and least messy method of applying antifouling is to use a small-medium pile roller with an extension handle. This keeps you at arm’s length from the paint and minimises the amount of bending and stooping necessary. It can be tempting to use a larger roller to get the job done quicker, but these absorb a large amount of paint, which, considering the expensive cost of most antifouls, means that the additional paint you’d need to buy will outweigh the time saved in most instances.
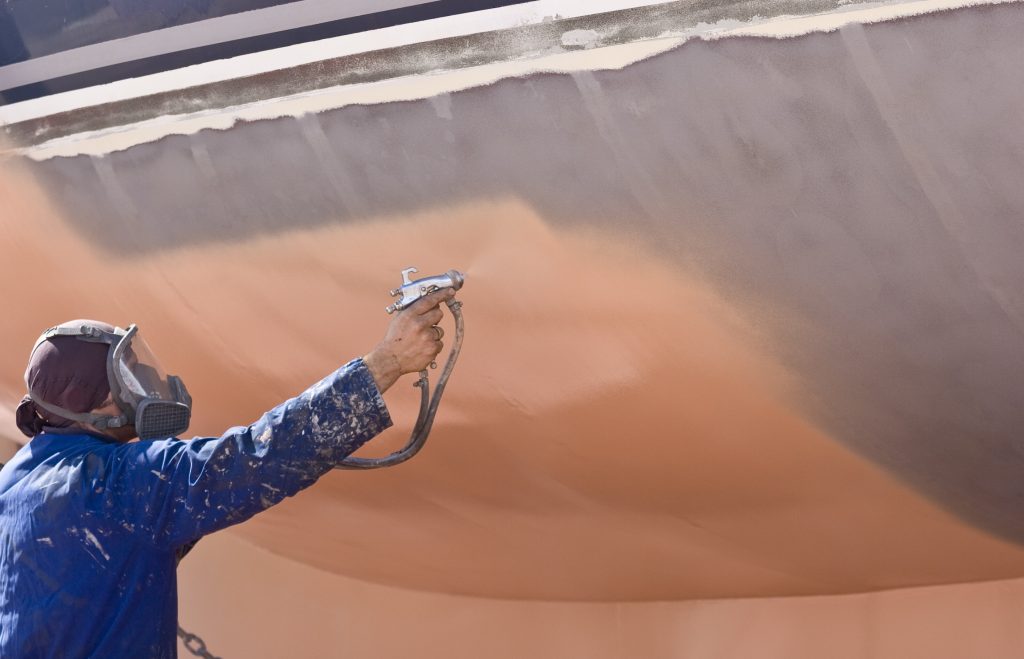
To really speed up the process, it is also possible to spray antifouling paint onto the hull. However, due to the toxicity of antifouling, this should only be undertaken by professionals with specialist facilities designed for this type of work.
In addition to accurately masking the waterline before applying antifouling paint to the hull, it’s important to remember NOT to paint over any sacrificial hull or shaft anodes, as this will stop them from performing properly.
If you’re antifouling aluminium outdrives, make sure to check the manual carefully, as these will often require a different type of antifoul to the hull.
When applying antifouling, a face mask, overalls, gloves, and goggles are needed to protect against contact with the paint. If your overalls don’t have a hood, it’s worth wearing a hat as it’s surprisingly easy to rub your head against the underside of the hull, with embarrassing and potentially toxic results.

Spraying antifouling paint can be a quicker and easier method of application. However, due to the toxicity of the substance, spraying antifoul should only be done by a professional with the correct protective equipment. Photo credit: Wirestock
Get painting
- Paint roller and tray
- Replacement rollers
- Wet-and-dry sanding paper
- Different sized paint brushes
- Masking tape
- PPE
How many coats of antifouling are needed?
Unless the boat is to be kept ashore and will only be in the water for a few weeks or local fouling conditions are very weak, at least two coats of antifouling should be applied every sailing season. You should also apply a third coat around the waterline and edges of the rudder and keel on sailing boats at a minimum.
Although antifouling paint can be expensive, you shouldn’t try to stretch the paint out! For the antifouling system to be effective, you must apply as much biocide to the hull as possible. And buying another tin to ensure a thorough coating and effective antifouling is much more important in the long run than risking damage to the hull!
It’s also essential to adhere to minimum overcoating and immersion times (usually clearly stated on the tin), as failure to do so is the most common cause of flaking and ineffective antifouling.
If you want to learn more about different antifouling paints or are even wondering whether antifouling is the right choice for you, you might want to take a look at one of these related articles:
- How to choose antifouling paint.
- Coppercoat: a worthy alternative to traditional antifouling?
- How to paint a boat.
Editor’s note: This article was originally published by Rupert Holmes in March 2021, and updated by Pippa Shaw in June 2024.


